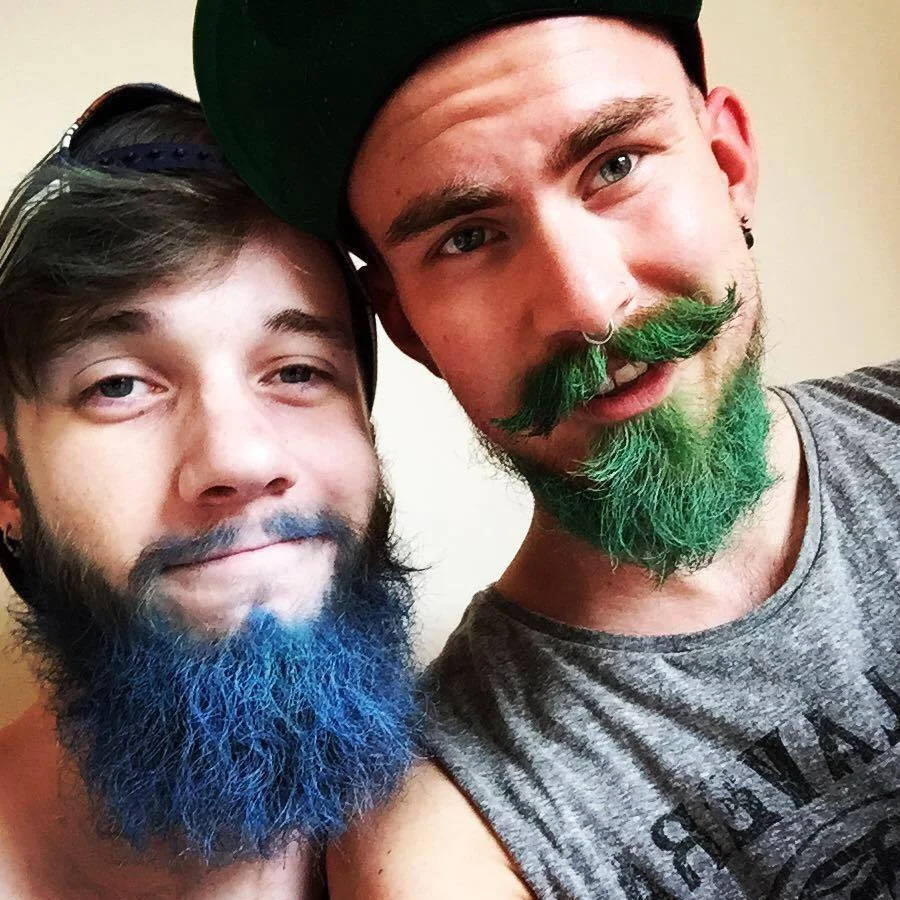
We noticed you enjoyed our Merbeards last week, so here’s a guide on how to temporarily achieve one!
What’s a Merbeard I hear you ask? A Merbeard is the art of dyeing one’s beard a funky colour, but shades of green or blue work best. Red could also work, if you’re going for that Disney look.
Like many beard owners I was intrigued by the Merbeard but not sure I was willing to bleach and dye my beard. Bleach doesn’t wash out and it can have some nasty effects on hair, from split ends to the dreaded snap-off. After losing an entire fringe to bleach back in 2013 (since recovered), I’ve been a bit wary of the stuff ever since.
It seemed like the Merbeard was beyond my grasp. That was until I met my current boyfriend, who’s very keen to go all the way with his Merbeard obsession. We found a temporary method to test out the Merbeard – Hair chalk!
I’ll warn you now; this is messy stuff! I would strongly recommend having some make up wipes at hand! I went with Derma V10 Chalk It Up, which cost me a whopping £0.99 from Bodycare! Alternatively, Kara McGrath recommends simply using artists soft pastels.
Okay, so your first step is to not wear anything you like. Get out the mess clothes. You might also want to don some latex gloves. Now get that beard wet (and your hair too if you want to go all out)! Because beard hair can be a bit coarser compared to the hair on top of your head, it’s pretty much impossible to get this stuff on to a dry beard. If you’ve just beard oiled up and don’t want to waste, maybe try this out later.
It’s so easy to get this stuff on your skin, yet so difficult to get off; accuracy is key. What you want to do is pull sections of your beard taut and then using your other hand run the chalk along this section (on the underside too for the best effect). You might need to do this a few times before the colour starts to show. Don’t panic if it looks dark (unless you’re beard is a bright colour, in which case it’s probably already showing), in natural light once your beard is dry it will be pretty vibrant.
Okay, so you’ve got a colourful streak in your beard now! You can stop there if you like, maybe that’s all you want. If you want to go all the way, start segmenting your beard and repeating that step of running the chalk along segments of beard held taut.
Once your whole beard is covered you might need to fill out the edges. Gently, without holding your beard, fill in the edges on your cheeks in a downward motion. This is probably when you’ll start getting the stuff on your skin. Do that same downward motion with a wipe and hope for the best, there really is no exact science to that, but hopefully only the skin underneath your beard will be covered.
The moustache can be tricky, depending on how much you have. For a thick one, it’s pretty much the same as your beard; pull taut, run chalk, colour. For a thinner moustache you might want to try very gently adding a bit of chalk to the centre then rubbing it along with your finger or one of those little eyebrow pencil brushes (they’re cheap in bodycare too!).
Almost done! Time for some clean up; you’ll probably need a fresh wipe for your face. Remember, downward motions towards the beard! Maybe your sink of shower needs a clean too… Don’t worry, it comes off easily!
So the tricky part is setting the colour. Heat can be helpful, and if you’ve got a tiny straightening iron that you can use on your beard then you’re set! Otherwise, crack out the hair dryer! After it’s all dry try some beard balm or wax to help set that stuff in place, wash your hands (it’s still going to come off a bit) and you’re set! Go stand in some natural light, get on Instagram and pick a good filter!
Top tip: If you want to avoid staining your neck, leave a layer underneath your beard uncoloured. Remember, this stuff is temporary and only to test out the Merbeard so it doesn’t have to look perfect, but chances are you won’t see the uncoloured under layer.

You can also (at least here in the US) get some of the Beyond the Zone temporary color spray. Super quick and easy, and washes out in the shower. I’ve been using that for a year for football games. 🙂 May have to try this method though! Thanks for the tips.